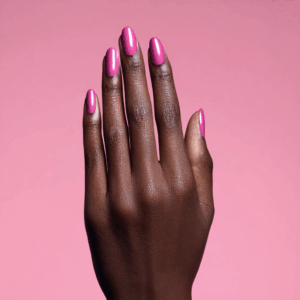
Polygel and acrylic are two of the most popular nail extension techniques in the beauty industry. Both methods offer a durable and long-lasting solution for those who desire beautiful and polished nails. However, many people wonder which method is easier to work with and to achieve consistent results.
In this article, we will explore whether polygel is easier than acrylic.
Is polygel easier to apply on nails compared to acrylic?

In my opinion, absolutely!
It’s a game-changer for beginners and experienced nail enthusiasts alike.
This material offers a simpler, more flexible, and overall more enjoyable nail enhancement experience.
Plus, it lets your creativity flow without any hassle.
Let me break down why I believe polygel nails have an edge over acrylic nails based on my experience and expertise:
1. No liquid to powder ratio needed
One of the beauties of polygel is that you don’t need to think about the liquid-to-powder ratio challenge you face with acrylic nails.
Unlike acrylics, where you need to get the mix just right, polygel comes pre-mixed and ready to roll straight out of the tube.
That alone makes it great for beginners and for at-home use.
2. Strength and flexibility
If you want nails that are as strong as they come, but you don’t want them to feel like armor, then give polygel a try.
It’s not too hard and not too soft.
Polygel nails are a fantastic fusion of acrylics and hard gel.
They give you the robustness of acrylics with a feather-light, flexible touch.
They won’t leave you feeling weighed down, but they’ll tackle everyday wear and tear like champs.
3. Pliable and easy to mold
Acrylics can sometimes be a bit stubborn to mold.
But polygel is truly a dream to work with.
Thanks to its pliable consistency, you can sculpt polygel nails with ease.
You can easily shape them to fit your natural nail or to dual forms.
If you’re a DIY nail enthusiast, you’ll appreciate how user-friendly polygel can be.
4. More time to make them perfect
Polygel nails only harden when you place them under a UV lamp, unlike acrylic nails, which air dry pretty quickly.
So with polygel, you have all the time you need to sculpt perfect nails and fix your mistakes before you cure them under a lamp.
And with acrylics, you need to work very quickly before the extensions air dry.
This is another reason why polygel is easier to use and more beginner-friendly than acrylics.
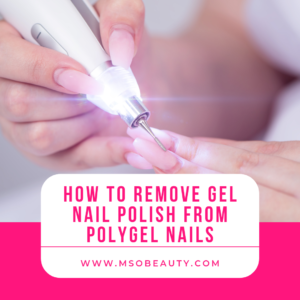
4. Easy removal
Removing polygel is also a breeze.
No need for prolonged soaking.
When it’s time to take your polygel nails off, just file them down with a nail file or drill.
5. No odor or airborne dust to take care of.
The acrylic monomer can fill the air with a strong, chemical odor that might require protective gear.
Plus, filing acrylic nails generates airborne dust particles.
So you may even need a professional nail dust vacuum to tackle the dust.
And polygel is odor-free, since it has no monomer.
In addition to that, the dust from filing it is heavier than air.
So you won’t have any airborne particles.
And all the debris is easy to clean.
Polygel is great for people who are sensitive to smells and dust.
Polygel nails overview
Let’s break down what polygel nails are:
1. Ingredients:
Polygel is a relatively new product that’s become super-popular in the nail world.
It’s made up of a blend of a polymer base (like what you find in regular acrylic nails) and a gel base.
You usually find it in squeeze tubes, which is quite handy.
2. Bendy and Flexible:
What makes polygel special is its flexibility.
Unlike regular acrylics, which can feel a bit stiff, polygel nails are more pliable and less rigid.
Thanks to the gel part, they can mold to your natural nails or dual forms easier than acrylic paste.
Thanks to their bendability and flexibility, polygel nails can handle everyday life without breaking or feeling uncomfortable.
3. Application:
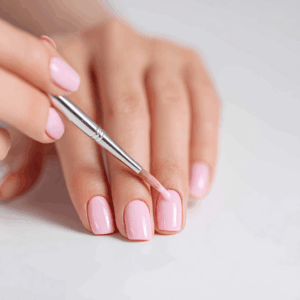
To build polygel nails, nail techs use a brush and slip solution (usually Isopropyl Alcohol) to shape and attach the material.
So you can sculpt your nails exactly how you want.
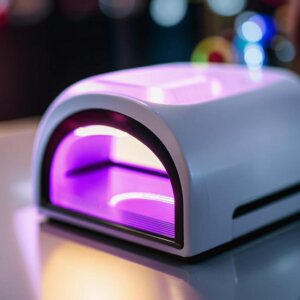
After you’re done, you need to cure them with a UV lamp for 1–2 minutes.
Plus, there’s no strong odor, which is nice for people with smell sensitivities.
4. Strong and Durable:
These nails mean business when it comes to strength and durability.
They’re less likely to chip or peel compared to some other materials.
So, you can count on your nail art lasting a good while.
5. Taking Them Off:
When it’s time for a change, removing polygel nails is relatively easy.
You’ll need to gently file most of the thickness.
And if there’s a thin coat left, you can quickly soak it off with acetone.
It’s usually gentler on your natural nails than removing acrylics, which need longer soaking and can be quite harsh.
6. Get Creative:
Polygel nails come in all sorts of colors and effects (like glitter, color-changing, etc.).
That means you can get as creative as you want with your nail art.
Whether it’s a fancy design, a smooth gradient, or a natural look, polygel can handle it all.
In a nutshell, polygel is a versatile and comfortable choice for nail enthusiasts and anyone who wants a long-lasting, gorgeous manicure.
Acrylic nails overview

1. Ingredients:
Acrylic nails are extensions and overlays, made from a mix of liquid monomer and acrylic powder.
When you blend these two, you get a paste-like substance that can be shaped into the nails you want over tips or forms.
2. How It’s Done:
Usually, a pro nail technician works their magic with acrylic nails.
They start by prepping your natural nails – cleaning and filing them.
Then, they use a tip or form to help them create the length and shape you want.
Next, they dip a brush into the liquid monomer.
Then into the powder to make a paste-like acrylic mix.
This mix goes onto your natural nails and the nail form and gets shaped while it hardens up through air drying.
3. Tough Nails:
Acrylic nails are like the superheroes of the nail world.
Once they’re on, they’re sturdy and can take on daily life without breaking or chipping easily.
That’s why people love them for their long-lasting durability.
4. Your Style, Your Way:
Acrylic nails are pretty versatile.
You can shape, file, and paint them however you like.
Whether it’s a classic French look, intricate designs, or bright colors, acrylic nails are like a blank canvas for a nail artist to work on.
5. Upkeep:
To keep acrylic nails looking their best, some maintenance is necessary.
Every few weeks, you’ll want to get a “fill” to keep that gap between your natural nail and the acrylic in check.
It keeps your nails looking fresh.
Or simply get your nails redone, which is better.
6. Taking Them Off:
When it’s time to part ways with your acrylic nails, pros usually soak them in an acetone solution.
But remember not to overdo it to keep your natural nails safe.
How to apply polygel nails easily
The use of dual forms is the easiest way to apply polygel nails.
Here’s how:
Supplies You’ll Need:
1. Dual Forms:
These are like nail molds.
Choose ones that match your nail size and the shape you want.
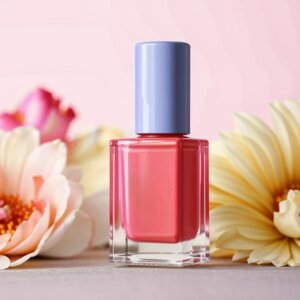
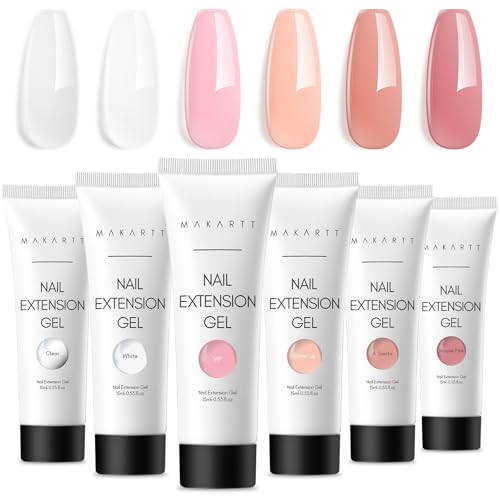
2. Polygel:
This is your sculpting material.
Pick the color and effect you like.
3. Slip Solution:
Typically, it’s made from Isopropyl Alcohol.
This liquid keeps things from sticking and helps you move and mold polygel.
4. Nail Brush:
Polygel shaping tool.
5. UV/LED Lamp:
This will cure the polygel, making it hard.
6. Base Coat:
It helps the polygel stick to your natural nails and protects the nail plate.
7. Top Coat:
Protects the surface of your polygel nails and makes them glossy (or matte if you choose a matte top coat).
8. Nail File:
Used for shaping your nails extensions to perfection.
9. Nail Drill:
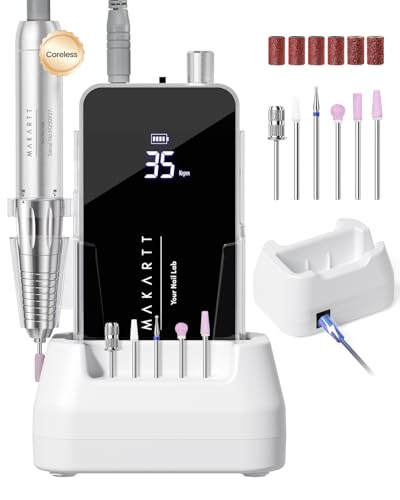
Handy for precise shaping and getting unwanted material from under the nail’s free edge.
10. Nail Cleanser:
For cleanup before and after the process.
Step-by-Step Instructions:
1. Prep Your Nails:
Begin with clean, dry nails.
Push back cuticles, trim if necessary, and gently roughen your natural nails with a file.
Apply a thin layer of base coat.
2. Select Dual Forms:
Find dual forms that match your natural nail size and shape you’re looking to create.
3. Use Slip Solution:
Dip your brush into the slip solution.
4. Fill the Dual Form:
Squeeze a bit of polygel onto the pick end of the brush and place it on the dual form.
Then use your brush to spread it inside the form.
5. Place the Dual Form on the Nail:
Press the filled dual form onto your natural nail, applying gentle pressure for proper adhesion.
6. Cure Under the Lamp:
Cure your nails under an LED lamp for approximately a minute.
This solidifies the polygel.
7. Remove the Dual Form:
Carefully pop off the dual form to unveil your newly shaped nail.
8. Shape and File:
Use a nail file to shape your polygel nails.
Be precise and gentle.
A nail drill can be used cautiously for more precise adjustments and filing under the nail edge.
9. Apply Top Coat:
Finish by applying a layer of top coat to seal and protect your polygel nails.
Cure them again under the lamp.
10. Cleanse Your Nails:
Use nail cleanser or rubbing alcohol to get rid of any sticky residue.
11. Final Touches:
Finally, moisturize your cuticles and hands to keep your nails looking their best.
There you have it, a set of stunning polygel nails easily created with dual forms.
Is polygel easier for beginners than acrylic?
Yes, polygel is often a smoother start for newbies.
You don’t need to worry about getting the liquid-to-powder ratio just right like you do with acrylics.
Plus, it’s more flexible during application, and won’t air dry, which can be forgiving for beginners.
Which nail extensions are stronger, polygel or acrylic nails?
Both have their strength, but polygel nails can be right up there with acrylics.
They’re strong and can handle daily life, giving you a balance between durability and comfort.
Which one lasts longer, polygel, or acrylic nails?
Well, both can hang around for a while if you treat them right, but acrylic nails are known for being long-lasting champs.
Just remember, how long they stay put also depends on how you take care of them.
In conclusion, if you’re someone who has struggled with the application of acrylic nails, polygel is definitely worth trying.
It’s much easier to work with, and you won’t have to worry about the strong smell of acrylic liquid or the mess it can make.
Polygel is also more lightweight and flexible, making it more comfortable to wear.
Practice and patience are key for mastering polygel application and achieving beautiful, long-lasting nails.
So, if you’re looking for a simpler and more comfortable alternative to acrylic, give polygel a try!