Are your nails feeling weak and brittle? Want to give them a little boost without going to a salon? Well, have you considered trying out a nail strengthener aka nail hardener? It’s a nifty little product that can help you achieve healthy and strong nails that are less likely to break or get damaged.
In this article, I’m going to fill you in on everything you need to know about nail strengtheners and how to use them like a pro.
What is nail hardener?

A nail strengthener is like a superhero for weak and brittle nails.
It’s a special product that you apply to your nails to make them stronger and less likely to break or chip.
Basically, it creates a protective layer over your nails.
It shields them from damage caused by water, chemicals, and everyday wear and tear.
Nail hardeners contain ingredients that strengthen the nail plate and promote healthier nail growth.
For example, nylon, calcium, Omega-3, or keratin proteins.
By using a nail hardener regularly, you can help your nails grow longer and healthier.
Just remember to follow the instructions and don’t expect this product to solve any underlying problems on its own.
Why should you use nail strengthener?
Using a nail hardener can bring a bunch of benefits.
Here’s why you should give it a shot:
1. Stronger Nails
If your nails are weak and always breaking or chipping, a nail strengthener can come to the rescue.
It strengthens your nails and makes them tougher, so they can handle more without breaking.
2. No Breakage
Weak nails often break easily, and it’s super frustrating.
But with a hardener, you get a protective layer that shields them from water, chemicals, and rough handling.
That means fewer breaks and more beautiful manicures.
3. Nail Growth
Strengtheners can actually promote nail growth and health.
They have vitamin-infused ingredients that reduce problems like splitting or peeling.
4. Aesthetic Boost
Not only do nail hardeners make your nails stronger, but they also make them look great.
You can often find these products in the form of a polish that leaves your nails with a flawless and impeccably groomed appearance, thanks to its clear or glossy finish.
Just remember, follow the instructions and don’t overdo it.
Nail hardeners work best when they’re part of a complete care routine that includes good hygiene and maintenance.
How to use nail hardener
Using this product has been an absolute game-changer in my nail care routine.
The formulas developed by leading brands are truly exceptional.
They glide on smoothly and evenly, making the application process a breeze.
I love how lightweight they feel on my nails, without any greasy or heavy residue.
Plus, the drying time is relatively quick, which is perfect for those of us who are always on the go.
After I use them, my nails feel stronger, more resilient, and less prone to breaking.
I’ve noticed a significant reduction in nail chipping and splitting, which used to be my biggest nail woes.
Read on to learn how you can incorporate a nail strengthener into your nail care routine.
Tools and supplies
Here are the tools and supplies you’ll need:
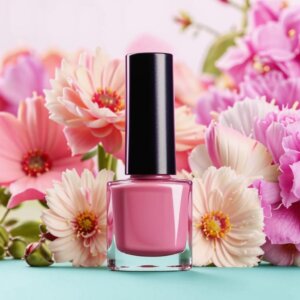
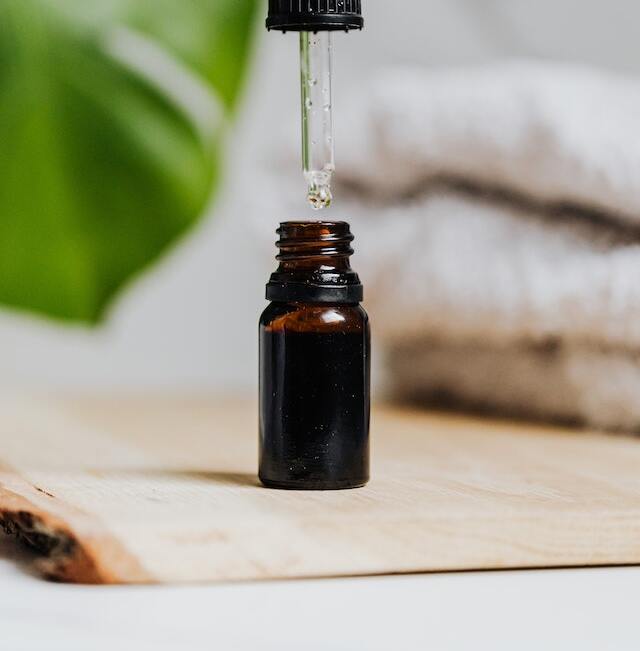
1. Nail Hardener
Get a bottle from a reputable brand.
Look for one that has ingredients like nylon, Omega-3, keratin proteins, or calcium to strengthen your nails.
You can choose between clear formulas or ones with a tinted or neutral color and glossy finish, depending on your preference.
Here’s my top pick:
Sally Hansen Hard as Nails Hardener
You can’t go wrong with the classic Sally Hansen nail products.
I’m always on the lookout for products that actually deliver what they promise, and this nail strengthener from a well-known brand has definitely earned a permanent spot in my nail care routine.
It contains nylon, soy bean oil, and Omega-3, a power trio that fortifies, safeguards your nails, and diminishes ridges.
Strengthening and Protecting
This nail hardener’s advanced formula goes beyond basic protection, fortifying nails with its powerful nylon formula.
When I apply this product it really reduces peeling or brittle nails.
Ridge Removal
Thanks to natural Omega-3 and Soy in the formula, Sally Hansen nail hardener also visibly diminishes ridges, leaving the nails smooth and even.
Easy Application
I love how easy it is to apply this nail hardener. Just 2–3 coats on bare nails, and I’m good to go!
The brush glides smoothly and evenly.
Plus, it dries quickly, so I can move on with my day without waiting forever for it to set.
Versatility
This nail hardener is my go-to for a natural look. I often wear it alone for a clean, polished appearance.
It even comes rose-tinted for a prettier look.
But it’s also the perfect base for when I want to add some color.
Either way, it keeps my nails protected and looking fantastic.
The Verdict
My nails are stronger, smoother, and healthier thanks to this wonderful product.
So I really recommend it.
Pros:
- An effective nail strengthener.
- Ridges get reduced.
- Quick drying and easy to apply.
- Versatile and can be worn instead of nail polish or as a base coat.
Cons:
- May not be suitable for severe nail issues where you need medical treatment.
- Require multiple (2-3) coats.
2. Nail Polish Remover
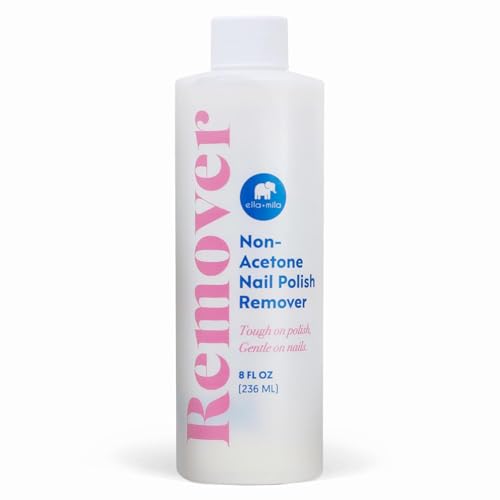
Start with clean nails by using a nail polish remover.
Go for an acetone-free option if you can to be gentler on your nails.
3. Mild Soap and Water
Give your hands and nails a good wash with some mild soap and water.
Make sure to dry them completely before applying the nail hardener.
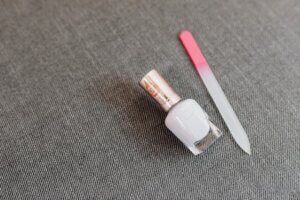
4. Nail File
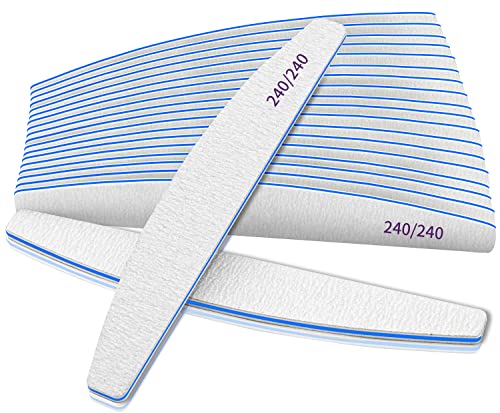
If needed, use a nail file to shape your nails before applying the hardener.
Choose a file with the right grit for natural nails — between 180 and 240.
5. Cotton Pads or Paper Towels
Keep some cotton pads or paper towels handy to clean up any spills, wipe away excess nail polish remover, and maintain a tidy work area.
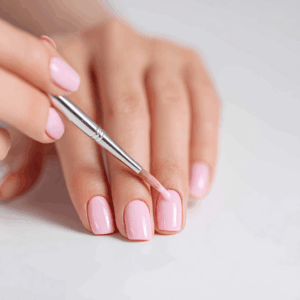
6. Applicator
Most nail strengtheners already come with a brush applicator attached to the cap.
This makes it easy to apply the product directly to your nails.
The brush is small and precise, allowing you to control how much nail hardener you use.
How to use nail hardener step by step
1. Start with clean nails
Make sure your nails are nice and clean, and free from any polish or oils.
Remove any old nail polish using a nail polish remover.
Give your hands a good wash with mild soap and water, then dry them thoroughly.
2. Shake the bottle
Give the nail strengthener bottle a good shake to mix up the formula.
This will help the product blend well and ready to work its magic.
3. Apply a thin layer
Use the brush that’s attached to the cap of the nail hardener bottle or your favorite nail brush.
Apply a thin and even layer of the product to each nail.
Start at the bottom near the cuticle and gently brush towards the tip of the nail.
Be careful not to apply too much, as a little goes a long way.
4. Let it dry
Allow the strengthener to dry completely.
Be patient and resist the urge to touch or mess with your nails while they’re drying.
The drying time can vary, so check the instructions on the bottle for guidance.
5. Apply a second coat (optional)
For optimal strength and protection, you can apply one or even two additional coats of nail hardener.
Especially if it is specifically recommended in the product instructions, such as in case of Sally Hansen’s Hard As Nails.
Repeat the same application process as before, making sure it’s a thin and even layer.
6. Keep up with regular application
To maintain strong and durable nails, continue using nail hardener regularly.
Some products may recommend reapplying every few days or as instructed on the packaging.
Consistency is key to achieving the best results.
How often should I use a nail strengthener?
It depends on the brand and product. Always follow the instructions provided by the manufacturer.
In general, most of them can be applied every few days.
Consistency is key for best results.
Can I wear nail polish over a nail hardener?
Yes! In fact, applying a nail strengthener as a base coat before your polish can provide additional protection to your nails.
How long does it take for it to show results?
Again, it depends on the product and the condition of the nails.
Generally, with regular use, you may notice improvements in nail strength and durability within a few weeks.
Are there any tips for maximizing the effectiveness of a nail hardener?
Just follow these tips:
- Keep your nails well-groomed and trimmed.
- Avoid excessive exposure to water and harsh chemicals.
- Wear gloves while doing household chores.
- Moisturize your nails and cuticles regularly.
Can I use a nail strengthener on artificial nails or nail extensions?
No, there’s no point in doing that.
These products are designed for natural nails.
Nail extensions do not need any reinforcement as they are already super-strong and durable.
How do I remove a nail hardener?
Use a non-acetone nail polish remover.
Soak a cotton pad or ball with the remover and gently rub it over your nails until the protective coating is completely removed.
Follow up with moisturizing your nails and cuticles to keep them hydrated.
Can I use a nail strengthener as a top coat?
No, this product should be applied to bare nail plate.
It won’t be effective if you use it as a top coat over a layer of nail polish.
If you want stronger, healthier nails, nail strengthener is definitely worth checking out!
You can easily achieve the stunning and durable manicure you’ve always wanted by carefully following the advice outlined in this comprehensive guide. By selecting a high-quality nail hardener that is specifically tailored to your needs, you’ll be well on your way to perfect nails.
Just remember to follow the application instructions and use the product regularly to see the best results.
So take some time to pamper your nails and feel confident showing off your fabulous new manicure.