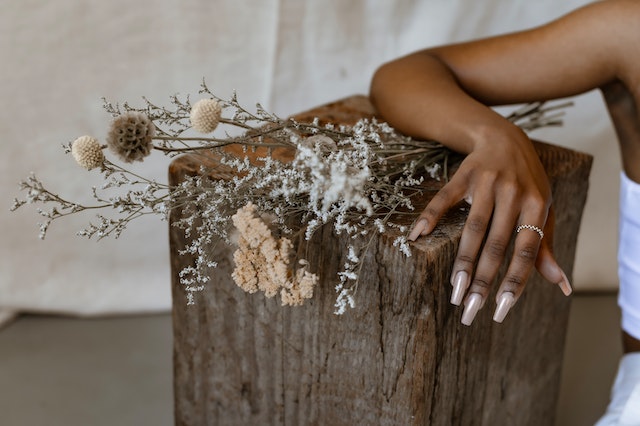
Have you ever tried Makartt polygel? It’s a super cool product that’s become really popular among nail enthusiasts because it’s easy to apply and lasts for a long time. With Makartt polygel, you can have salon-quality nails without having to leave your house. But if you’re new to working with it, it can be a little intimidating. That’s why I’ve put together a guide to help you use Makartt polygel like a pro.
In this article, I’ll give you the basics on Makartt polygel, including what it is, how it works, and what you need to start using it. I’ll also give you step-by-step instructions on how to apply Makartt polygel to create perfect nail extensions.
Let’s dive right in!
Makartt Polygel for nails overview

Makartt is a brand of polygel.
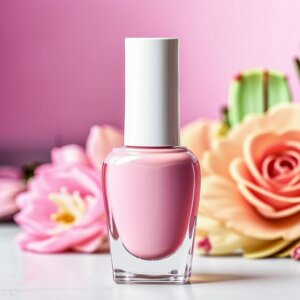
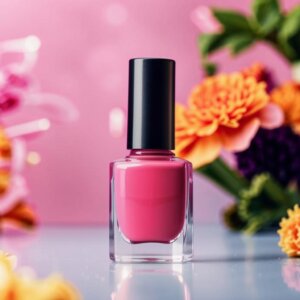
Polygel is a type of nail enhancement product that combines the best features of traditional acrylic and gel nails.
It is a hybrid of sorts, which is neither a gel nor an acrylic powder, but instead a blend of both.
Polygel is typically applied over the natural nail or extensions using a brush and slip solution for easier manipulation.
One of the biggest advantages of polygel is that it is much easier to work with than traditional acrylics.
It’s less runny and has a more workable consistency.
Polygel also doesn’t require monomer, which is used in acrylic applications and can cause allergic reactions.
It’s a pre-mixed product.
So with polygel, you get the perfect paste-like consistency out of the tube.
That’s why you don’t need to worry about powder to monomer ratio.
Polygel is cured with a UV lamp, just like gel nails.
This gives it the durability and strength of acrylic nails but without any potential damage to the natural nails.
Makartt polygel is a great option for those who want to achieve the look of acrylic nails but with the ease of application of gel nails.
It’s also a versatile product, allowing for a wide range of nail designs and styles.
Tools and supplies you’ll need to use with Makartt polygel
To use Makartt polygel to create nail extensions, you will need several tools and supplies.
Here is a list of all the necessary items:
1. Makartt Polygel or a Makartt Polygel Kit
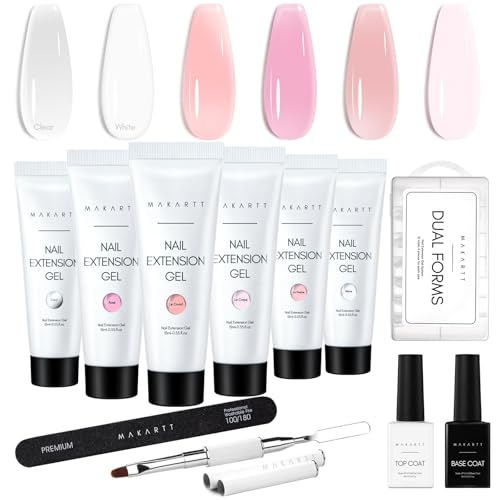
You can either buy single tubes of Makartt polygel, a set of polygels, or a whole all-in-one kit.
A Makartt Polygel Kit contains everything you need to get started.
This includes the polygel itself, a base coat, a topcoat, slip solution, a dual-ended brush, dual forms, and a nail file.
Some kits also contain an LED lamp, dehydrator, and primer, nail buffers, and foil forms.
The best thing about these kits is that they come with tools and supplies that are specifically designed by Makartt for use with their polygel.
So Makartt nail kits are perfect for both beginners and experienced users.
2. Polygel Slip Solution

The slip solution is a special alcohol-based liquid.
It’s used for moving and smoothing out polygel during the application process.
It also prevents polygel from sticking to the brush or to your fingers.
This makes it easier to mold and shape the material.
3. Dual forms

You will need polygel dual forms to create your extensions.
A huge advantage of polygel is that it’s compatible with these super-convenient forms.
Dual forms are plastic molds that can be used over and over again.
They help to create perfectly-shaped polygel extensions.
You can find them in different sizes and shapes to fit your nails perfectly.
Dual forms are great!
You basically get ready-made extensions and a perfect nail apex literally “out of the box”. Even if you’re just staring out with polygel.
So after you’ve cured the material and removed the forms, you only need to add a few finishing touches with a nail file.
Makartt manufactures dual forms in several shapes and sizes.
You can choose the ones that best suit your needs and nail shape.
Most Makkart polygel nail kits come with dual forms.
You can also buy them separately.
4. Nail File
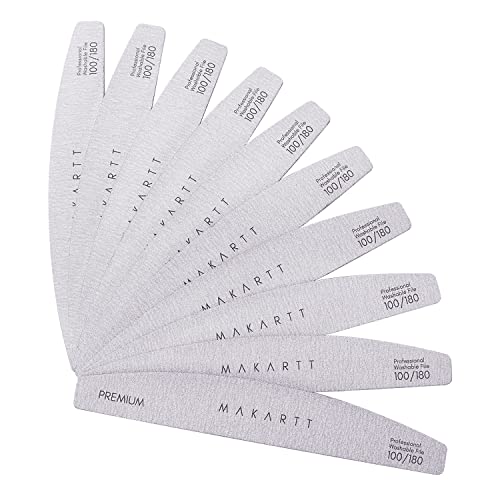
A nail file is essential for shaping and smoothing the polygel once it has been applied.
Choose a file with a medium grit to start.
After that, you can switch to a finer grit to smooth out any rough edges.
5. UV Lamp
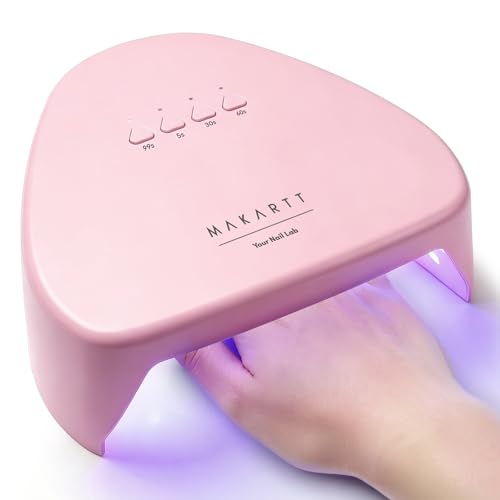
Makartt polygel is always cured under a UV light.
So you will need a high-quality UV/LED lamp to help your polygel nails harden.
6. Gel Base Coat

A gel base coat is essential for helping polygel adhere properly to the natural nail.
It provides a sticky surface for the polygel to bond to, which helps to prevent lifting and chipping.
7. Gel Top Coat
A gel top coat seals and protect the polygel extensions or gel nail polish you coat them with.
Plus, it provides a beautiful glossy (or matte) finish and helps to prevent the polygel or polish from chipping and fading.
8. Nail Dehydrator and Nail Primer
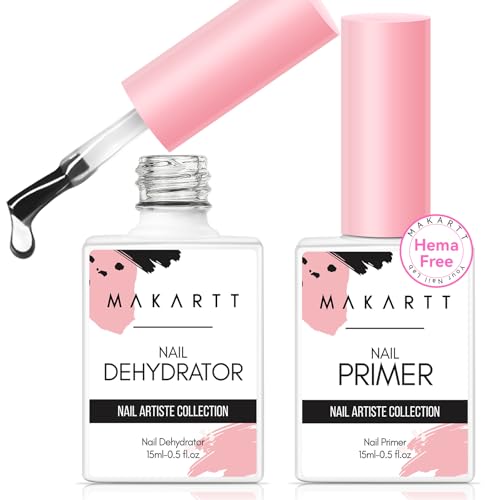
Use nail dehydrator and primer for preparing the natural nail for the polygel application.
The dehydrator removes oils and moisture from the nail surface.
This helps the material stick to the nail plate better.
The primer enhances the bond between polygel and the natural nail.
Apply it to the tip of each nail and let it dry before using the base coat.
9. Brush/picker tool for Polygel

Makartt Polygel Kits usually come with a dual-ended brush/picker tool.
It’s necessary for spreading, shaping and smoothing the polygel on the nails or on dual forms.
10. Picker Tool for Polygel
A picker tool is a small spatula for picking up small amounts of polygel from a tube and applying this material to your nails or dual forms.
The picker is usually attached to one of the ends of a dual-ended polygel brush for convenience.
11. Dappen Dish for Slip Solution
Dappen dish is a little container that holds slip solution, which helps shape and mold polygel nail extensions.
This dish makes it easy to access and dip your brush into slip solution during the polygel nail application process.
12. Nail Drill
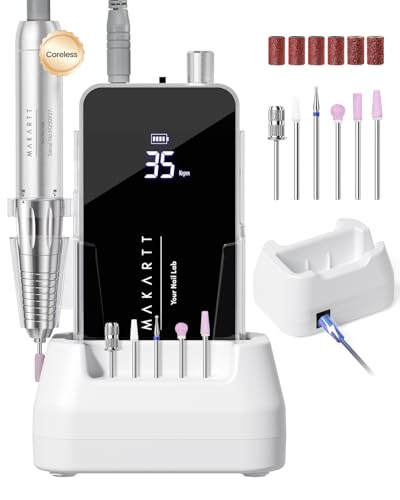
If you’re looking to create or remove polygel nails at home, a nail drill is a must-have tool as well!
It helps to make sure your application process is precise and accurate.
You can use it to file your natural nails, shorten dual forms, and remove any excess polygel.
This includes the unwanted polygel under your nail that a regular nail file can’t reach.
You’ll get a smooth and even surface that’s perfect for coating with polish, or just a top coat.
Plus, when it’s time to remove your polygel, a nail drill can make the process so much easier.
13. Nail Cleanser

Use a nail cleanser to clean the natural nails before applying the polygel.
Get one that contains 99% Isopropyl Alcohol for best results.
14. Cuticle Pusher

A cuticle pusher is necessary to push back the cuticles before applying nail extensions.
This will help polygel adhere properly to the natural nail.
If you want your polygel nails to look amazing, it’s worth investing in some high-quality tools and supplies.
With the right stuff, you can get professional results at home.
How to use Makartt polygel step-by-step
- Start by preparing your nails.
Remove any old nail polish, shape and buff your nails, and push back your cuticles.
Use a nail cleanser to wipe off any dust from filing.
- Apply the nail dehydrator to your nails in a thin coat and let it dry.
This will remove any oils and moisture from your nails, which will help the polygel adhere properly.
- Apply a thin layer of nail primer only to the tips your nails and let it dry.
This will help the base coat and the polygel extensions bond to your natural nails better.
- Apply a thin layer of gel base coat to your nails.
- Cure the base gel under a UV lamp for the recommended time (usually it only takes 30 seconds).
- Take out a set of dual forms from the Makartt Polygel Kit and select ones that fit your nails best.
- Squeeze a small pea-sized amount of polygel from its tube onto the picker tool.
- Place this bit of polygel into the dual form and use your brush to spread it evenly.
- Pour some slip solution into the dappen dish.
- Dip the brush into slip solution from time to time.
Use it to move, mold, shape, and smooth out your polygel.
- Add more portions of polygel as needed and spread and shape them using the brush.
- Place the dual form on your nail.
Make sure it’s centered and snug against your natural nail.
You can use clear plastic nail clippers to hold dual forms in place more securely.
- Cure the polygel under a UV lamp for the recommended time.
Once it’s become hard, you can remove the dual form by gently twisting it off.
- Repeat these steps for each nail, making sure to cure it under the UV lamp before moving on to the next one.
- Once you’re done building all the nails, file and shape them to your desired length and shape, using an emery board nail file and a nail drill.
File all the imperfections down too.
- Use a nail drill with a conical bit to file underneath the tip of each nail to make it thinner.
- Apply a thin layer of gel top coat to your nails.
- Cure the top coat under a UV lamp for the recommended time.
- Use 99% Isopropyl Alcohol and a lint-free wipe to remove any stickiness from the gel top coat (if you’ve used a top coat with a sticky layer).
Congratulations! You have now successfully created beautiful and long-lasting nail extensions using Makartt polygel.
Remember to take good care of your nails and use quality products to maintain them.
Can I use foil forms instead of dual forms?
Yes, you can use foil forms instead of dual forms if you’re used to working with them.
However, dual forms make it a lot easier to build a perfect apex and a smooth surface for your nail extensions.
Plus, they require minimal fixing and filing.
How long does it take to cure Makartt polygel under the UV lamp?
The curing time can vary depending on the strength of your UV lamp.
In general, it can take between 1–3 minutes to cure polygel.
What is the purpose of using Makartt dehydrator and primer?
The dehydrator removes oils and moisture from the natural nail, which helps the polygel adhere properly.
The primer helps to bond polygel to the natural nail, which can help to prevent lifting and chipping.
Can I use any gel base coat and top coat with Makartt Polygel?
Of course, it’s always better to use Makartt gel base coat and top coat with the brand’s polygel.
That’s because they are formulated to work well with each other and provide the best results.
However, you can use other brands if you prefer.
Most high-quality products are very compatible with other products with similar quality.
For example, Gelish Fantastic Four is an amazing set of nail prep products that works perfectly with all brands of polygel.
How long will my Makartt Polygel nail extensions last?
When properly applied and cared for, Makartt Polygel nail extensions can last up to 2–3 weeks, or even more.
However, the longevity can depend on other factors such as your natural nail growth speed, your lifestyle, and the care you take of your extensions.
Plus, don’t forget about proper nail prep before you build your polygel nails.
Can I remove Makartt Polygel nail extensions at home?
Yes, you can remove them at home easily.
But it’s important to do so carefully to avoid damaging your natural nails.
I don’t recommend using acetone because it can’t break up polygel as well as it removes acrylics.
So the best way to take polygel nails off is by filing them down with a nail file or a nail drill.
Can I reuse the dual forms or foil nail forms?
Yes, dual forms are reusable.
However, foil nail forms are designed for single use only.
Can I use Makartt Polygel on natural nails that are damaged or weak?
Always avoid using Makartt Polygel or any other material on damaged or weak natural nails.
It can cause further damage.
Make sure your natural nails are healthy and strong before applying any kind of nail extensions.
If you want to create some gorgeous nail extensions, then Makartt polygel is definitely worth trying.
It’s super fun and easy to use, and with the right tools and techniques, you’ll be a pro in no time!
I hope this step-by-step instructions and tips will give you the confidence to dive right in, whether you’re a pro or just love doing your own nails.
Plus, Makartt polygel is high-quality and easily accessible.
So you don’t have to go to a salon to get amazing results.
Why not get creative and play around with different colors, shapes, and designs?
It’s all about expressing your individuality and having fun.