Have you ever thought about getting acrylic nails? They’re a super popular beauty trend that’s been around for quite a while! If you want to enhance the appearance and strength of your natural nails, they’re a great solution. But if you’re new to the world of acrylics, you might not be familiar with all the different components that go into creating the perfect set. One of the key ingredients is the acrylic nail liquid (aka monomer), which is used to create a solid foundation for your artificial nails.
In this article, we’ll explore what acrylic nail liquid is, how it works, and why it’s so important for achieving a flawless set of acrylic nails.
So, let’s dive in!
What is acrylic nail liquid?

Acrylic nail liquid, often referred to as “monomer,” is the secret sauce behind those fabulous acrylic nails.
But what exactly is it, and how does it work?
Let me break it down for you.
The Composition of Acrylic Nail Liquid
At its core, the acrylic monomer is primarily composed of Ethyl Methacrylate.
This liquid plays a pivotal role in the world of nail enhancements, and here’s why:
The Combination of Liquid and Powder
Imagine you’re an artist, and you need the perfect blend of paint and water to create your masterpiece.
In the world of acrylic nails, this “paint and water” analogy translates to monomer and powder.
These two elements come together to form a paste that’s used to sculpt those gorgeous acrylic nail extensions.
The Right Ratio Matters
You can’t just mix these two components randomly.
Achieving the perfect liquid to powder ratio is an art in itself.
Get it right, and your paste will have the ideal consistency for sculpting.
Get it wrong, and it will be too dry or too runny.
The Polymerization Process
Once you’ve created your acrylic paste, you apply it to the natural nail plate.
As the paste air-dries, it goes through a process called polymerization.
What it means is that your once-pliable paste transforms into rock-hard, super-durable acrylic nails.
No UV or LED lamp required.
It air-dries surprisingly quickly.
Acrylic Monomer Has No Alternatives
Now, you might wonder if there are any shortcuts or alternatives to this liquid.
The truth is, there’s no real substitute for monomer for acrylic nails.
You can’t just use acrylic powder alone or with some other liquid like polygel slip solution.
There will be no polymerization reaction.
A Bit of Caution
There are a few things to keep in mind about monomer.
It does come with an unpleasant odor.
And, in rare cases, it can cause irritation or allergic reactions in some individuals.
So use it with caution and ensure proper ventilation when working with it.
Tools and Supplies for Creating Acrylic Nails with Liquid Monomer and Powder
Let’s dive into the detailed list of what you’ll need to craft acrylic nails:
Note: you can buy most of the supplies in the form of an all-in-one kit or a special set.
1. Acrylic Nail Liquid (Monomer):
This is your primary building block.
Ensure you have a high-quality monomer.
Buying Acrylic Monomer
When you’re in the market for acrylic nail liquid, you’ll often find it sold as part of a set with powder.
You can also buy the monomer bottle separately.

For building my acrylic nails, I personally favor Mia Secret’s monomer and powder combination.
Here’s why:
Pros:
- Safe and Trustworthy: Mia Secret’s monomer uses EMA (Ethyl Methacrylate), a safe choice for cosmetics.
- No Yellowing: Say goodbye to discoloration; this formula keeps your acrylic nails looking stunning.
- Sculpting Made Easy: Its flexibility makes crafting acrylic nails a breeze, whether you’re a pro or just starting out.
- Strong Adhesion: Mia Secret’s monomer ensures your acrylic nails stay put and chip-free.
- Leak-Proof Assurance: The bottle’s cap keeps your precious liquid where it belongs.
- Beginner’s Buddy: Are you new to acrylic nails? Mia Secret’s monomer is user-friendly and perfect for beginners.
- Perfect Pair: It’s a match made in nail heaven when paired with Mia Secret’s acrylic powders.
- Trusted Brand: Mia Secret, a reputable brand, is a go-to for nail enthusiasts and professionals.
Cons:
- Be Aware of the Smell: Like many, it has a distinctive odor, but the results are well worth it.
2. Acrylic Powder:

Acrylic powder is always needed for working with monomers.
These two elements blend together to create the sculpting paste for your nails.
Clear, pink, and white are the most common powder colors.
I use Mia Secret powder with their monomer.
They blend together perfectly.
And the powder is also a high-quality professional product.
3. Nail Tips or Forms:
You’ll need something to shape the extensions on.
Nail tips or forms will be your canvas for creating the nail shape you desire.
4. Nail Dehydrator and Primer:

These two nail prep products help improve adhesion between the natural nail and the acrylic mixture.
It’s an essential step for long-lasting extensions.
5. Acrylic Nail Brush:
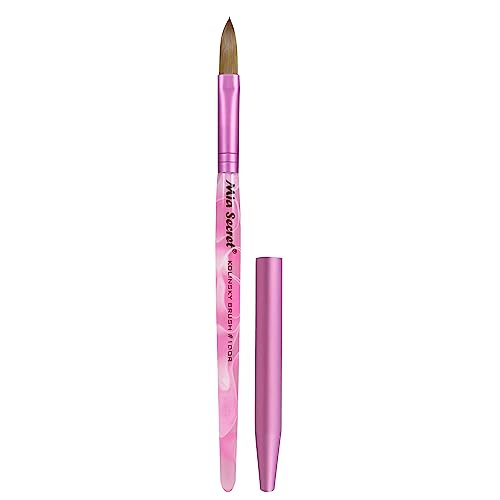
A brush is the tool you’ll use for picking up monomer and acrylic powder, and for sculpting your acrylic nails.
6. Dappen Dish or Glass Jar:
This is where you’ll pour a small amount of acrylic nail liquid for easy access during the application.
7. Acetone or Nail Polish Remover:
Acetone is essential for cleaning your brushes and tools, as acrylic residues can harden quickly.
Also, you’ll need to use it later to remove your acrylic extensions.
8. Nail File and Buffer:
To shape and smooth the artificial (and natural) nails, you’ll need various grit nail files and buffers.
Coarse files are for shaping, while finer grit buffers create a smooth finish.
9. Cuticle Pusher and Nippers:
These tools help with cuticle and natural nail maintenance and ensuring a clean canvas for acrylic application.
If you’re using nail tips, a cutter will also help you trim them to the desired length.
10. Gel Top Coat

The top coat is an added layer of protection for your nail extensions.
It also adds a high-gloss or matte finish (depending on the type of top coat).
No need to use a base coat with acrylic nails.
11. Gel Nail Polish:
You may want to apply nail polish (followed by topcoat) for added color and shine.
12. Ventilation System:

Working with acrylic nail products may produce strong and unpleasant odors and fumes.
You’ll need a well-ventilated workspace.
Some professionals go the extra mile to ensure air quality by using a specialized exhaust system or ventilating their nail table.
13. Safety Gear:
To protect yourself, consider wearing latex or nitrile gloves, safety glasses, and a mask to avoid inhaling any dust or fumes.
Step-by-Step Guide: Creating Acrylic Nails with Monomer and Powder
Here’s a step-by-step guide to help you achieve stunning acrylic nails:
Before You Begin:
-Ensure you have all the necessary tools and supplies ready.
-Work in a well-ventilated area, or consider using a nail table with an exhaust system.
-Make sure your natural nails are clean and free from any old polish or oils.
Step 1: Preparation
Start by pushing back your cuticles gently using a cuticle pusher or orange wood stick.
Trim and shape your natural nails with a nail file.
Plus, lightly buff the surface of your nails to remove shine.
Step 2: Nail Tips or Forms
Decide whether you want to use nail tips or nail forms to create the extensions.
Nail Tips: Apply a small amount of nail glue to the tip of your natural nail and press the nail tip onto it. Trim and shape the tip as desired.
Nail Forms: Attach the nail form under your natural nail, creating a template for the acrylic extension.
Step 3: Primer
Apply a nail primer to your natural nails.
This helps to improve adhesion and ensures the acrylic adheres well.
Step 4: Mixing the Acrylic
Pour a small amount of acrylic nail liquid into a dappen dish or glass jar.
Dip your brush into the monomer and then into the powder, picking up a small bead of the mixture.
The liquid to powder ratio should be around 1.5 to 1 respectively to achieve the right consistency — not too wet or dry.
Step 5: Application
Place the bead of this acrylic mixture onto the nail tip or form, near the cuticle area.
Use your brush to shape and smooth the acrylic, working from the cuticle area towards the tip.
Ensure it’s evenly distributed and free from air bubbles.
Step 6: Sculpting
While the acrylic is still pliable, use your brush to refine the shape and thickness of each nail extension.
Apply more beads of acrylic mixture as necessary to create your extensions.
Pay attention to achieving the desired curvature and thickness, depending on your preferred nail shape, form the apex.
Continue the process of application and sculpting for each nail, working on one at a time, as acrylic dries quickly.
Step 7: Curing
Allow the acrylic to air-dry and polymerize.
It will gradually harden and become solid.
This process typically takes a few minutes.
Step 8: Finishing Touches
Once the acrylic is completely dry and hard, remove any nail forms (if you’ve used them).
Use nail files and buffers to shape and smooth the acrylic nails to perfection.
Start with a coarse file to shape and use a finer one for a polished finish.
Step 9: Clean-Up
Wipe away any dust using lint-free wipes.
Step 10: Nail Polish and Topcoat
Apply your choice of nail polish and a topcoat for added color and shine, if desired.
Step 11: Final Tips
After completing your acrylic nails, moisturize your cuticles and nails regularly to keep them healthy and hydrated.
And there you have it – your own set of stunning acrylic nails created with monomer and powder.
Practice makes perfect, so don’t be discouraged if your first attempt isn’t flawless.
Is monomer the same thing as nail glue?
No, monomer is a liquid used with acrylic powder to create the acrylic paste for nail extensions.
Nail glue is a separate adhesive used for attaching nail tips or decorations.
Can I use any type of liquid with acrylic powder, or does it have to be acrylic monomer?
You can only use acrylic monomer specifically designed for acrylic nails.
Other types of liquids won’t work.
The powder will not be able to polymerize.
Does acrylic nail liquid have a strong odor?
Yes, monomer does have a noticeable odor.
It’s a common characteristic of this product.
Working in a well-ventilated area or using a nail table with an exhaust system can help manage the odor.
How do I dispose of a leftover or expired monomer?
Dispose of it following local regulations for hazardous waste disposal.
It definitely should not be poured down the drain or discarded with regular household waste.
How can I make my extensions dry faster, or should I use a UV/LED lamp?
Acrylic nails usually air-dry quite quickly.
You don’t need a UV/LED lamp to speed up the curing process as it won’t work.
Just ensure proper ventilation and avoid using too much liquid at once.
Are there eco-friendly or odorless alternatives to traditional acrylic monomer?
Some brands offer low-odor acrylic monomers, which can be less pungent, but they dry a bit longer than regular ones.

For example, check out Mia Secret Fusion odorless monomer.
While it’s not completely odor-free, the smell is very light.
Acrylic monomer is a key component in creating acrylic nails, and understanding how to use it safely and effectively is essential for successful nail enhancements.