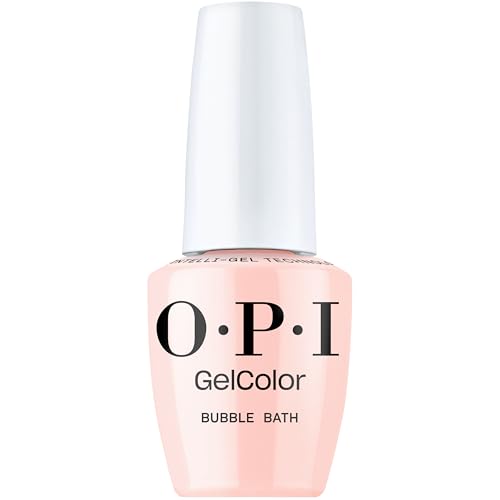
Planning to buy an OPI GelColor bottle and wonder if you really need a UV light to make it work?
In this article, we’ll find out the answer. I’ll walk you through what the light actually does, how UV and LED lights differ, and what happens if you skip it. I’ll also share tips for curing each layer and how at-home setups compare to salon tools. You’ll see common mistakes that make your gel chip or peel, and you’ll learn when you can try alternatives that don’t need a light.
Why OPI GelColor Isn’t Like Regular Polish and Does Need UV Light
OPI Gel Color is a gel polish, so it has a different drying process from regular polishes.
A regular nail lacquer air-dries.
Once you paint your nails, the thin liquid film slowly toughens.
After a few minutes, the polish feels dry to the touch.
You can move around, type, or open a door without smudging it.
This works because the polish is designed to harden with air alone.
Gel polish works differently.
It doesn’t harden just by sitting out.
Gel polish, like OPI GelColor, needs light to activate a chemical reaction.
This reaction is called curing.
Curing turns the soft, wet polish into a solid layer that sticks to your nails.
Both UV and LED lamps can trigger this reaction.
UV lights take a bit longer, and LED lights work faster, but the principle is the same: light causes the polish to set and bond.
If you skip the light, the gel stays soft and sticky.
It might look dry on top for a few minutes, but touching it will leave marks.
It peels off easily, and the color can smear.
Your nails won’t get the shine and durability that gel polish is known for.
The polish can also lift around the edges, which makes your manicure look uneven and messy.
OPI GelColor and other true gel systems are designed with this kind of curing in mind.
The light isn’t optional.
Without it, you don’t get the long-lasting finish, the smooth feel, or the glossy look.
Types of Lights: UV vs LED
There are two main kinds of lamps for gel nail polish: LED and UV.
Both make your gel harden, but they work a little differently.

LED lamps are the faster option. They usually cure one coat of OPI GelColor in about 30 seconds.
The light is strong and focused, so the gel reacts quickly and bonds to your nail.
Because it works fast, you can finish your manicure in less time.
You still need to cure each layer separately, but the overall process moves along without long waits.
UV lamps take longer.
A single coat often needs around two minutes under a UV light.
The light is gentler and spreads out more, so the polish takes longer to harden fully.
Some older or smaller lamps may need even more time. If you rush it, your polish might feel sticky or soft.
Both LED and UV lights get the job done.
OPI GelColor cures under either lamp, and the final result can look just as shiny and smooth.
The main difference is speed.
LED saves time, UV takes patience.
The gel bonds the same way and will last equally well once it’s cured properly.
Both lamps are valid for OPI GelColor. Your choice depends on what you have at home. Just make sure to cure every layer fully so your manicure stays smooth, shiny, and lasts for days.
How to Cure Each Layer
The first step in a gel manicure is preparing your nails.
Start by cleaning them to remove any oils or residue. You can use a gentle cleanser or an alcohol wipe.
Then, lightly buff the surface.
This helps the gel stick better and gives a smoother finish.
Avoid over-buffing. You don’t want your nails to feel rough or thin.
Next, apply a thin layer of gel base coat.
Spread it evenly over the nail, keeping it close to the cuticle but not touching the skin.
Put your hand under your lamp and cure the base coat.
The light hardens the gel and gives the first layer a solid foundation.
Skipping this step or not curing fully can make the next layers uneven.
After the base, apply your first OPI Gel Color coat.
Again, keep it thin and smooth.
Pop your nails under the lamp for the proper time: LED or UV.
This layer starts building the color and shine. If the polish is too thick, it may not cure properly and could feel sticky or peel later.
Add a second color coat for a deeper color.
Cure it just like the first.
Two thin layers usually give the best results.
Finally, apply a gel top coat.
This seals the color, protects the nail, and adds shine.
Cure it completely.
After curing, some gel top coats leave a sticky layer.
Wipe it off with a lint-free cloth and a bit of Isopropyl Alcohol.
Curing each layer separately is key.
It builds strength, keeps the color smooth, and stops bubbles or uneven spots.
Common Mistakes with OPI Gel Color
1. Not leaving enough time for each layer to cure
If a coat doesn’t fully harden, your nails feel soft, and the polish can peel or lift.
Taking the right amount of time under the lamp keeps the gel solid and smooth.
2. Applying layers too thickly
Thick coats are harder for the light to reach.
The center might stay sticky while the edges cure, leaving uneven spots.
Thin, even layers let the gel harden all the way through.
3. Skipping curing between layers
Each layer builds on the previous one.
If a layer isn’t cured first, the bond weakens.
The polish may chip faster, and the shine can look uneven. Curing between coats creates a strong, long-lasting manicure.
4. Ignoring your lamp’s instructions
Each unit is a little different.
Some need extra seconds, some less.
Checking the guide helps you set the right curing time and avoid sticky or soft nails.
When You Could Skip the Lamp

Not all gel-like finishes need a lamp.
OPI’s Infinite Shine line is a hybrid lacquer that gives your nails a glossy, durable look without UV or LED light.
You can paint it like regular polish, and it dries on its own. l
It lasts longer than standard polish and gives a shine that looks like gel.
This system is different from OPI GelColor.
Infinite Shine doesn’t cure under a lamp, so it doesn’t create the same hard, long-lasting bond.
If your goal is the full gel experience (strong, firm, extra glossy layers that resist chipping for weeks), you still need a proper gel polish and a curing light.
OPI Infinite Shine is a lighter, easier option that still looks polished and smooth.
Using Infinite Shine at home is simple.
Apply the base coat, one or two color layers, and the top coat.
Let each layer air dry.
Some people like to keep both systems on hand: Infinite Shine for quick manicures and true GelColor when they want a longer-lasting gel finish.
To wrap up, OPI GelColor needs a curing light to set properly. Both UV and LED lamps work, but the time each takes is different. LED lights cure quickly, while UV lamps take a bit longer.