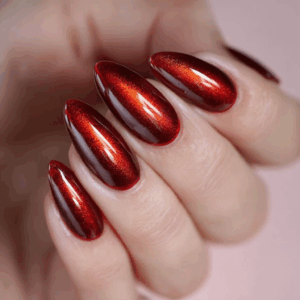
If you want to give your nails some extra TLC, cuticle oil pens are a must-have in your beauty kit. These pens are super handy for keeping your cuticles healthy and hydrated. Which can help prevent pesky nail problems like cracking and splitting. You can make your own cuticle oil pens. It’s an easy, budget-friendly, and fun DIY project.
In this article, we’ll go over everything you need. From the materials and tools to the step-by-step process for creating your own custom cuticle oil pens.
Let’s dive right in!
What are cuticle oil pens?

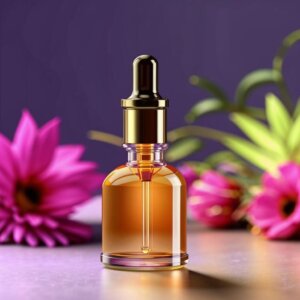
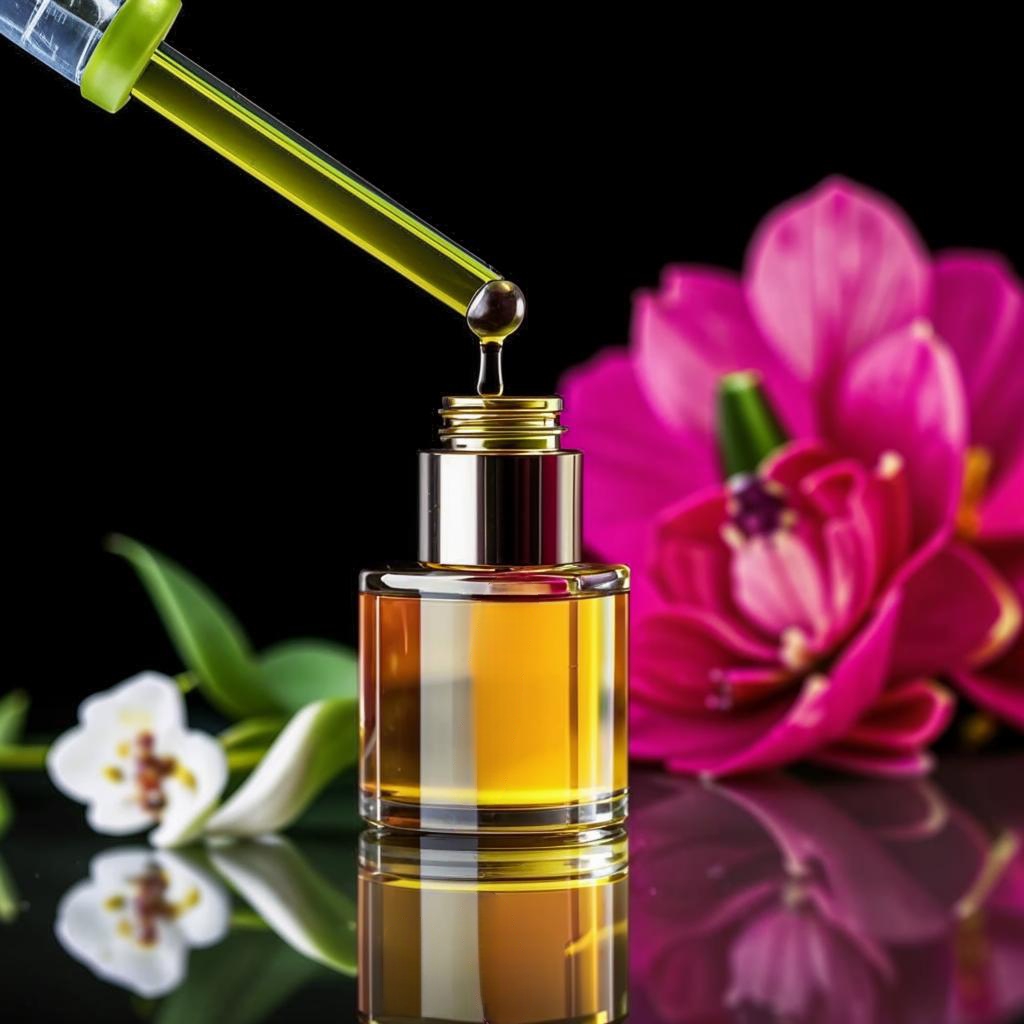
Cuticle oil pens are small tubes or pens filled with a moisturizing oil blend.
The oil is designed to keep the cuticles of your nails healthy and hydrated.
Cuticle pens are usually equipped with a brush or roller ball applicator.
This applicator makes it easy to apply the oil directly to the cuticles.
The oils used in these pens can vary.
Usually, they comprise a mixture of carrier oils such as jojoba, sweet almond, or coconut oil, combined with essential oils like tea tree oil or lavender.
These oils work together to soothe, nourish, and protect the cuticles.
They promote healthy nail growth and prevent dryness and cracking.
Cuticle oil pens are a popular and convenient way to keep your nails looking and feeling their best.
Make your own cuticle oil pens
You can make your own cuticle oil pens instead of buying them from a store.
Here’s why you should give them a try:
- This DIY project will let you customize the scent and the ingredients to suit your preferences and needs.
You can choose carrier oils and essential oils that work best for your skin type.
Plus, you can also address any specific concerns you may have, such as dryness or fungal infections.
- Making your own cuticle oil pens gives you greater control over the ingredients you use.
This lets you avoid harsh chemicals and artificial fragrances that may be present in some store-bought options.
So you’ll have peace of mind knowing exactly what is going onto your skin.
- This can be a fun and rewarding DIY project.
It lets you get creative and experiment with different oils and scents.
And you can even gift them to friends and family as a thoughtful and personalized beauty item.
How to make your own cuticle oil pens
Making cuticle pens is a fantastic way to take your at-home manicures to the next level.
Not only can you customize the scent and the ingredients to your liking, but you can also have fun doing it.
One of my favorite ways to do it is to fill my with my own cuticle oil blend that I create from scratch.
I like to use a blend of carrier oils like jojoba, sweet almond, and coconut oil, along with some essential oils like lavender or tea tree oil.
This blend is not only moisturizing, but it also smells divine!
Once I have my cuticle oil blend ready, I fill empty cuticle oil pens that I get on Amazon using a syringe.
This method is super easy and allows me to reuse the empty pens that I already have on hand.
I always buy pen blanks with a brush applicator.
This way I can apply the oil directly to my cuticles without any mess.
So give it a try and experiment with different oils and scents until you find the perfect blend for you.
Cuticle oil pen ingredients, tools, and supplies
Here are few tools, supplies, and ingredients that you’ll need:
1. Carrier Oils
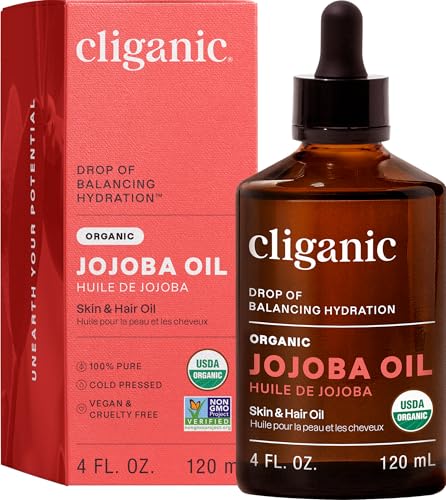
Carrier oils are the base oils that make up the bulk of your blend.
Some popular carrier oils include jojoba, sweet almond, and coconut oils.
These products are nourishing and moisturizing, and are a great place to start when making your own cuticle oil.
2. Essential Oils
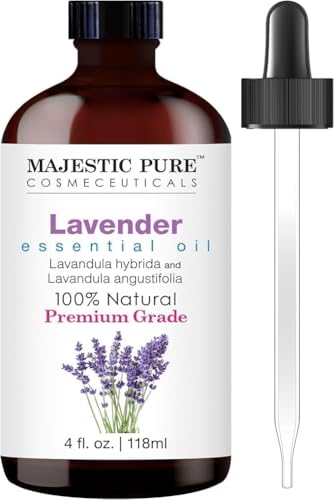
Essential oils are highly concentrated plant extracts that add fragrance and therapeutic benefits to your cuticle care blend.
Some popular essential oils for DIY skin products include lavender, tea tree, and peppermint.
Get essential oils that are safe for topical use and are appropriate for your skin type.
3. Empty Cuticle Oil Pens
You will need blank cuticle oil pens or tubes to store your blend.
They are available on Amazon.
I recommend getting pens with brush applicator tips for convenience.
Some of these blanks are refillable, but some are not reusable.
You can choose non-reusable ones if you don’t want to wash the tight containers. I prefer them because they are more sanitary.
Then you can simply discard them after your blend runs out.
4. Syringe or Dropper
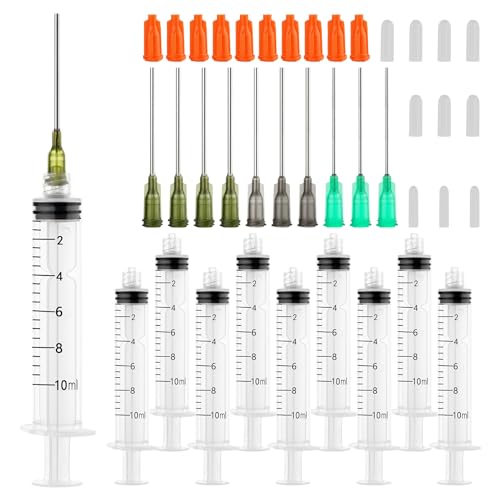
To fill your cuticle oil pens, you will need a syringe or dropper.
These tools will let you transfer your blend from the mixing container to a pen blank.
5. Mixing Container
You will need a small mixing container to blend your carrier oils and essential oils together.
A glass bowl or jar works well for this.
6. Labels
If you want, you can label your cuticle oil pens with the ingredients and date of creation.
That way you’ll be able to keep track of what you’ve made and when it was made.
You can also buy some of these supplies as sets.
How to make your own cuticle oil pens step by step
Here’s a step-by-step guide on how to make your own oil blends and cuticle oil pens:
1. Making Cuticle Oil
A. Choose your carrier oils
Select 2-3 carrier oils that are nourishing and moisturizing for the skin.
Good options include jojoba, sweet almond, and coconut oil.
B. Add essential oils
Add a few drops of essential oil to your carrier oil blend for fragrance and therapeutic benefits.
Use essential oils that are safe for topical use and appropriate for your skin type.
For example, lavender oil is great for relaxation.
While tea tree oil has antibacterial properties.
C. Mix the oils
Use a small glass bowl or jar to mix your carrier and essential oils together.
Use an immersion blender or a small whisk, or fork to ensure that the oils are well blended.
D. Transfer to a dropper bottle (optional)
This step is optional. You can transfer the oil from the mixing container directly to your pen using a syringe.
Or you can pour it into a bottle if you have too much oil left.
Once your oil blend is well mixed, use a small funnel to transfer the oil into a dropper bottle.
Label the bottle with the date and ingredients.
2. Making Cuticle Oil Pens
A. Gather your supplies
Grab your empty cuticle oil pens or tubes and a syringe or dropper.
B. Fill the pens
Use a syringe or dropper to fill the cuticle oil pens with your homemade oil blend.
Fill the pen up to the top, leaving a small amount of space for the brush applicator.
C. Insert the brush
Once the pen is filled, insert the brush applicator into the top of the pen.
Be sure the brush is securely in place.
D. Cap the pen
Cap the pen tightly to prevent any oil from leaking out.
You can label the pen with the date and ingredients.
E. Use and enjoy
Your homemade cuticle oil pens are now ready to use!
Simply apply a small amount of oil to your cuticles and massage it in.
Use the oil pen as often as needed to keep your cuticles moisturized and healthy.
Can I reuse an empty cuticle oil pen?
Yes, if your pen is refillable you can reuse it.
Clean it thoroughly with soap and water, or with rubbing alcohol before filling it with a new blend.
What’s the best carrier oil to use for cuticle oil?
Jojoba is a great carrier oil to use for cuticles.
It’s easily absorbed by the skin and is rich in vitamins and minerals that promote healthy nail growth.
How many drops of essential oil should I add to my carrier oil blend?
The amount of essential oil you should add to your carrier oil blend depends on your personal preference and the potency of the essential oil.
In general, you can add 1–2 drops of essential oil per tablespoon of carrier oil.
Can I mix carrier oils together?
Yes, you can mix carrier oils together to create a custom blend that meets your needs.
Experiment with different combinations to find what works best for your skin.
How often should I apply cuticle oil?
You can apply cuticle oil as often as needed.
But it’s best to use it at least once a day to keep your cuticles moisturized and healthy.
How long does homemade cuticle oil last?
Homemade cuticle oil can last up to 6 months if stored in a cool, dry place.
That’s why it’s best to label it with its creation date.
Check your pens or oil bottles from time to time and discard any blend that has expired or developed a bad odor.
What’s the best way to fill the cuticle oil pens with my homemade blend?
The easiest way to fill the cuticle oil pens is to use a syringe or dropper to transfer the oil into the pen.
Most funnels would be too big for the narrow container.
Use the dropper or syringe to slowly fill the pen, avoiding any spills or mess.
How do I clean the brush applicator on my cuticle oil pen?
To clean the brush applicator, simply wipe it clean with a tissue or cotton pad after each use.
Can I use cuticle oil on other parts of my body?
Yes, cuticle oil can be used on other dry areas of the skin, such as elbows, knees, and feet.
How long should I leave cuticle oil on my nails?
You can leave it on your nails for as long as you like.
Some people prefer to apply the oil before bed and leave it on overnight for maximum hydration.
Can I add vitamin E oil to my cuticle blend?
Yes, vitamin E oil is a great addition to cuticle oil.
It’s rich in antioxidants and can help promote healthy nail growth.
Add a few drops to your carrier blend before filling the cuticle oil pen.
Can I add color to my cuticle oil?
While it’s not necessary, you can add a drop or two of food coloring to your cuticle oil blend.
This will give it a fun and unique look.
Just be sure to mix it well to avoid any staining of your skin or clothing.
If you want to keep your nails healthy and moisturized, making your own cuticle oil pens is a great DIY project.
All you need are a few simple tools and ingredients.
And you can create a personalized blend that meets your specific needs and preferences.
It’s definitely worth giving a try!