Are you tired of going to a salon to get a set of nail extensions? Do you want to create your own polygel nails but don’t know where to start? Polygel and dual forms are a perfect combination for creating a perfect set of gorgeous nails at home quickly and easily.
Dual forms let you instantly create salon-quality nails without any special skills, saving you hours of work. And today I’ll show you the best polygel dual form kits.
My top 3 picks
Best polygel dual forms
Easy To Use Forms With A Natural Curve, Great For Small Nail Beds
Modelones 120 Piece Dual Nail Forms Kit
Modelones is known for creating very nice and high-quality polygel nail kits.
Modelones dual forms are ideal for a beginner.
You will instantly get correctly-shaped nail extensions with them.
They are very easy to use and don’t require a lot of time for learning how to apply them.
They have lines on them so you can choose your desired length and see how far you need to spread polygel on all the forms.
Modelones forms are perfect for creating the coffin and ballerina shapes.
One of the most notable features of the Modelones dual forms is that the curvature of these molds is not extreme.
So you can create a natural-looking apex and a correct C-curve on your extensions with them.
They’re also a good fit for flatter nails.
And they will come useful for those who have a hard time fitting dual forms, as they are suitable for fingers with narrow nail beds too.
A good fit will help your polygel nails stay longer without lifting.
There are 12 sizes for you to choose from. With 10 pieces for each size. One for each finger. 120 pieces in total.
You can do nails for your friends and family with this selection of sizes.
Modelones forms are sturdy enough so you can remove them easily after you cure your polygel nails. They just pop off with minimal effort.
All the forms are reusable and come in a convenient storage box with compartments for every size. So you’ll never mix them up.
This kit may not be useful if you are looking for forms with a high apex curve as they are more on the flat side.
Polygel Dual Forms With Convenient Size Markings, Suitable For Toenails And Large Nail Beds
Makartt 140 Piece Polygel Dual Forms
Makartt is another popular brand of polygel nail kits and gel nail polishes.
The company manufactures a set of dual forms that are very easy to use.
Each form has special scales for measuring the length of your polygel extensions.
They also have a little curl at the end so you can easily pry them off after you have cured the polygel.
This 140 piece dual forms kit comes in 14 sizes, with 10 pieces for each size, for 10 nails.
A big plus of this kit is that each form has a number indicated close to the tip. So you can easily find and remember the size you need to use.
The forms are pretty wide and are great for large nail beds. They are wider than the nail beds to allow some room for the polygel to spread.
That’s why you can use the largest sizes on your toes.
To apply polygel to your toes place a small bead of product onto the end of the form that goes near the cuticles.
Spread it a little bit. Then place the form onto the nail and press it down. The polygel will spread to the tip of the toenail.
The forms are also reusable and don’t lose their shape after you remove them.
They’re sold in a plastic storage box with 12 slots.
Dual Forms For Stiletto Nails
Aoraem 120 Piece Stiletto Dual Forms Set
Most dual forms are made for coffin and ballerina shaped nails.
But if you love stiletto nails then you can create them instantly and very easily using polygel with the help of these stiletto dual forms.
These forms eliminate hours of work.
No need to file the pointy stiletto tips or build a correct apex for strengthening them.
The molds will do everything for you.
The Aoraem set contains 120 stiletto pieces in 12 sizes. With 10 pieces for each size.
Each transparent form has length scales and a size number on the tip.
So you can easily find the size you need and build a stiletto nail with just the right length.
They also have the right curvature necessary to build strong and durable long stiletto nail extensions.
Since the pointy tip is difficult to remove, each form has a small round tap attached to the pointy end.
This tab will help you pry the molds off easily after you’ve cured the polygel under the lamp.
The stiletto set comes in a convenient plastic box with compartments.
These forms are a bit on the narrow side though, so they may be difficult to fit if you have very wide nail beds.
Polygel Nail Kit With Dual Forms
Makartt Polygel Nail Kit
This polygel nail set by Makartt is a great starter kit for creating nail extensions.
It contains four pink polygels, white and clear polygels, a base coat, a top coat, a picker tool, a nail file, instructions, and a set of 60 dual forms.
The dual forms come in 12 sizes with 5 pieces for each size, for 5 nails.
These forms have a substantial curve. That’s why they will be great for creating long nail extensions.
They are all reusable and are packaged in a transparent plastic box with 12 compartments.
There are no foil forms in this set. It only comes with dual forms.
This set is especially good for creating French manicure nail extensions.
You get a selection of four shades of pink for the base of your French manicure nails and a white polygel for building the tips.
You can use the pink ones for building solid color pink nails too.
The kit also contains a clear polygel that you can use for building nail extensions that you’ll cover with gel nail polish.
Or you can mix this clear polygel with sequins, glitter powder, or pigments and build creative French manicure tips instead of white ones.
Polygel Set With Dual Forms And Lamp
Beetles Polygel Nail Kit With Lamp
This is a great starter kit that has everything you need to begin doing your own polygel nails.
Not only does it contain polygels and dual forms, but it also includes the slip solution, base coat, two top coats, a large assortment of nail art supplies and tools, and a powerful UV/LED nail lamp.
Only 3 polygels come with this kit: pink, white, and clear. But that’s enough to create tons of nail designs.
You can use the pink and white ones for a set of French manicure nails. And the clear one for making extensions that you’ll cover with gel nail polish.
The top coats that come with the Beetles kit are glossy and matte ones.
You can finish your nails with a shiny or a velvety matte look, depending on the style of nail art that you want to create.
Matte nails look especially beautiful with nail diamonds.
And the Beetles set includes a wide array of rhinestones for nails in several shapes and sizes.
In addition to that, you get nail decals, nail art tapes, and nail foil and glitter flakes in several colors, including silver and gold.
So you can create gorgeous nail designs on your new polygel extensions.
You’ll also get a set of tools with the Beetles polygel kit. Including a nail file, tweezers, a polygel picker/brush tool, foil forms, and, of course, dual forms for nails.
There are 12 sizes of both flat and curved polygel dual forms in this set.
The forms have length markings on them.
You may need a set of clear nail clips to hold the dual forms in place while you’re curing the extensions. They’re sold separately.
The set comes with a UV/LED nail lamp that’s fine-tuned to work with the brand’s polishes.
And it works with polishes from other brands too.
The lamp has 48W of power. This is quite a lot. So it’s capable of curing any polygels and gel nail polishes, even highly-pigmented ones.
It also has several timer settings.
Choose 60-90 seconds for curing the polygel and 30 seconds for curing the base coat.
Beetles promises that all their products are non-toxic. So you won’t get any harmful chemicals with the polygels in this set or with Beetles gel nail polishes.
Large Set Of Wide And Curvy Dual Forms
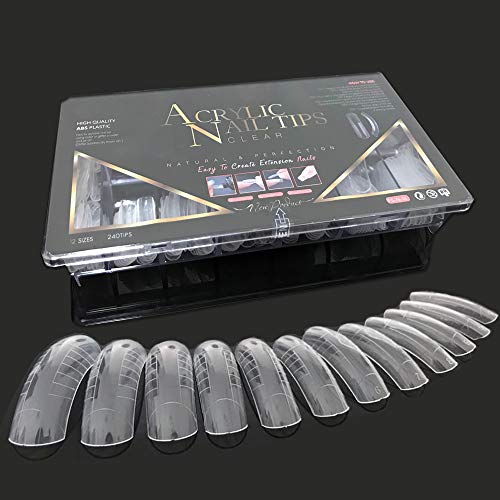
Liffly 240 Piece Dual Forms Set
Liffly set of polygel dual forms is twice as large as most other sets on the market.
It contains 240 pieces in 12 sizes. So you get 20 pieces per size.
The whole collection is packaged in one plastic box with 10 compartments.
Each form has scales to make it easy for you to choose the necessary length of your extensions.
All the forms are made of durable ABS plastic. They are reusable and will last for a long time.
These forms are a great fit for large nail beds and can be used on the toes too.
Liffly dual forms are very curvy. This allows you to build long nail extensions with a high C-curve, but may not work for people with flat nail beds.
Nail Clips
Clear nail clips are necessary for holding dual forms in place under the lamp if they don’t stick to your nails properly on their own.
They prevent lifting.
This set contains 10 clips, one for each finger on one hand.
You can use these nail clips with any brand of dual forms. They fit any nails.
They are made from clear plastic. So the lamp’s UV rays will get through with no problems.
Your polygel extensions will get cured evenly, and there will be no uncured spots where you’ve attached the clips.
The clamps are easy to use. You can attach them by simply clipping them on.
They are reusable, durable, and will last for a long time.
What are polygel dual forms?
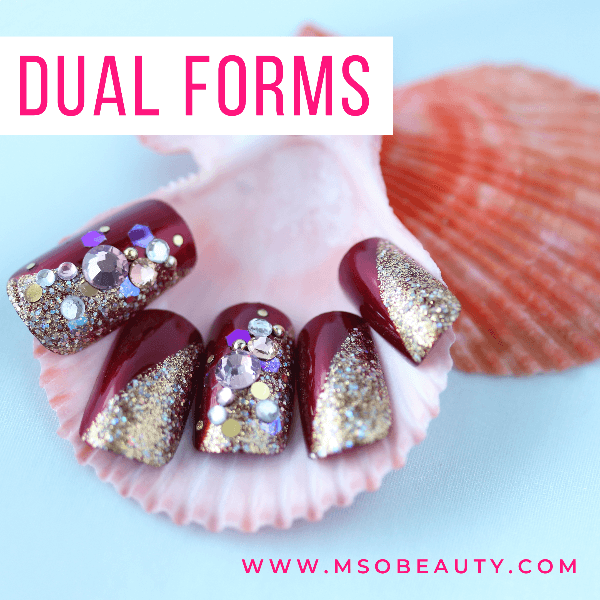
Dual forms are special plastic forms that you can use instead of the traditional tips or forms with polygels to create perfectly-shaped nail extensions extremely quickly and easily.
Dual forms are amazing to work with if you’re a beginner.
When you apply polygel with dual forms you instantly get smooth and ideal nails.
No need to do extensive filing.
You will only need to file them just a bit for absolute perfection and to get the extra material from under the free edge and from around the form.
Also, no need to worry about creating
perfectly shaped C-curves on the nails.
No need to worry about the placement of the apex point for strengthening your extensions either.
Dual forms will do everything for you.
There are no limits on what you can create with these forms.
No need to use them only for short-length single-color nails.
You can be as creative as you want, make long nails in any fancy shape and with any design imaginable.
Dual forms work best with polygel.
They do work with other builder materials like acrylics or gels. But polygel is the easiest to use material for dual forms.
These forms have convenient lines on them that mark the lengths of the extensions that you can create.
So you can easily select the one you need and use the same length on all your nails.
Unlike tips and foil or paper forms, dual forms have to be applied to your entire nail plate, not only to the tips of the nails.
You don’t have to use glue or do any fancy cutting to attach a dual form.
Just use a suitable size and apply it together with polygel.
What is polygel that you need to use with dual forms?
Polygel, also known as acrygel, is a new material on the market.
It’s a cross between acrylics and gels.
Polygel has all the best features of gels and acrylics combined minus their downsides.
It’s a great and convenient material for building gorgeous nail extensions.
Polygel is stronger than other materials but it doesn’t feel as heavy on the nails.
So it’s comfortable to wear.
It has the perfect consistency right when you squeeze it out of the tube.
So you don’t need to select the correct powder to monomer ratio like you need to do with acrylics.
And it’s not necessary to use the smelly monomer at all. The slip solution that works with polygel is made from rubbing alcohol.
Polygel is pretty much odorless, which is great if you are sensitive to odors.
You can control the application of polygel and shape it easily.
Unlike gel, polygel is not runny, it stays where you have placed it.
You can smooth it out using the slip solution and you won’t need to file polygel extensions too much.
Unlike acrylics, it doesn’t air dry so you can take your time while working with it.
You need to cure polygel with a UV/LED lamp in the same way as you do with gel nail polishes or gels.
And polygel cures quickly and easily, with no unpleasant heat spikes.
Polygel also lasts for 2-3 weeks without chipping or lifting if you apply it right.
Applying it right is very easy with dual forms for nails even for a complete beginner.
How to use polygel with dual forms
Choose the dual forms
There are several sizes of dual forms for nails.
Most kits contain several sizes for you to choose from.
Usually the bigger the number the smaller the size. With 0 being the largest size for the thumb and, for example, 11 in a 12-size kit being the smallest one for the pinky finger.
Choose your perfect size by fitting the dual form to your natural nails.
However, the size you should select must be slightly larger than your natural nail plate.
Otherwise, your extensions will be too narrow and small.
You can always file any extra material off later.
And if the forms are too wide you can also file them down to make them narrower.
Preparation
All nail extensions require the same preparation process.
It starts with pushing back the cuticles and removing excessive free edge length.
Then you need to buff the shine off the nails slightly to make the extension material stick to them better.
After that, cleanse the nail from any dust left from the filing process with a nail cleanser or 99% Isopropyl Alcohol using lint-free wipes.
Use a dehydrator to remove moisture and natural oils from the nail plate. This is one of the steps that prevent nail extensions from lifting.
Apply some nail primer to each nail and let it dry for a couple of minutes.
This will also help your polygel extensions stay on longer.
Now you are ready to apply the base coat.
Base coat
The base coat is a crucial step in the polygel manicure routine.
Polygel is not adhesive enough to stick to your nails on its own.
You can use a gel base coat with your polygel nail extensions.
You can also use a rubber base gel. It’s even more effective for working with polygels.
Apply one layer of the base coat to your natural nail plate and cure it under the LED lamp for about 30 seconds.
You can select the low power setting if your lamp has one. This helps to prevent heat spikes when you are curing the base coat.
Now you can start applying the polygel.
Applying polygel to the dual forms
Every polygel kit contains a spatula applicator tool.
It’s needed for picking the polygel from the tube and placing it onto the forms.
To apply polygel to your dual forms scoop a pea-sized bit of product from the tube with the spatula end of the picker tool.
Pick just a little bit of product because you can always add more.
Place the polygel onto the dual form.
Use the flat brush end of the picker tool to flatten the polygel bead and to distribute the product over the dual form.
Dip the brush in the polygel slip solution from time to time.
It eliminates friction and helps you distribute and smooth out the polygel.
The measurement scales on the forms are convenient for selecting the length of your polygel nails.
Apex
The strength and longevity of your nail extensions also depend on their correct shape and structure.
When you make nail extensions you always have to create a smooth apex curve for strengthening your extension’s stress zone.
And you need to place the apex point (the highest point) of this curve in the right place, usually in the middle of the nail plate.
You also need to create the same curve on all your nails to get a balanced set of extensions.
The best thing about dual forms is that they do everything for you!
So a complete beginner can create a set of absolutely perfectly shaped nails.
The curve of the form automatically creates an ideal and natural-looking curve with the apex right where you need it.
Applying the dual forms to the nails
After that, put the dual form on the nail and press it lightly in place.
Remove excess material that gets out over the edges of the form.
If too much polygel gets out from the sides of the dual form when you apply it and press it against the nail then use a thicker kind of polygel.
A more viscous material will be easier to apply with these forms.
For example, Makartt polygel is thick and easy to work with using dual forms.
Thinner polygels work better with traditional forms because they are easier to move around on those forms.
Then you can place your hand with the dual form under the lamp to cure the polygel.
If your forms aren’t staying well on your nails you may need to use nail clips.
Nail clips
Nail clips may be necessary if your polygel dual forms don’t stay in place on their own.
Use the clips after you have applied the forms with polygel to your nails to hold the forms while you’re curing the polygel under the lamp.
Attach them facing the side of the nail.
The clamps prevent lifting and the formation of air bubbles.
Nail clips are made of clear plastic so they won’t get in the way of the UV rays in the lamp.
Curing the polygel
You need to cure polygel in the same way as you cure gels and gel nail polishes.
It only hardens under a UV or LED nail lamp.
Cure it together with the dual forms.
They are transparent and let the UV rays pass through with no problems.
Polygel only takes about 60-90 seconds to harden under an LED nail lamp.
You can cure one side of the nail for 60 seconds then turn the nail and cure the other side.
This will let you cure your extensions evenly and prevent lifting.
Polygel doesn’t cause any heat spikes under the lamp, so you won’t get any unpleasant sensation while you are curing it.
After you’ve pulled your hand out of the lamp you need to remove the dual forms by applying a bit of force to each side of the form separately.
Don’t worry, your extensions won’t come off together with the forms.
Polygel also doesn’t leave a sticky residue so it’s easy to file to perfection without wiping the tackiness off.
Filing and buffing
Polygel doesn’t require excessive filing. You pretty much smooth it out while shaping it and the dual form creates a smooth surface too.
However, several areas need a bit of attention to make them perfect.
Use a 180 grit emery board nail file for that.
First, you need to file the end of the tip of the nail. It needs to be smooth so it won’t snag on anything.
You can also create or improve the desired shape or length of the nail with filing.
Another area that needs attention is the slope from the apex to the cuticles.
The area near the cuticles shouldn’t be too thick. So it almost always needs a bit of filing to make it thinner and to smooth it out.
Avoid touching the surrounding skin though.
After that, buff the surface of the nail extension slightly, including the slope from the apex to the tip and the sides.
And of course, pick the excess polygel from under the tip of the nail and make the free edge thinner.
You may not be able to do it with a nail file.
So use a nail drill for that. A nail drill bit can get into that tight space and remove the extra material.
Top coat
After you’ve filed your polygel nails to perfection it’s time to apply the top coat.
Paint one layer of the top coat and cure it under the lamp.
Use a glossy top coat if you want your nails to be shiny.
Or use a matte top coat if you like matte velvety nails.
If your top coat is a no wipe one then you won’t need to wipe the stickiness off at the end of your polygel application process.
But if the top coat stays sticky after curing then just wipe it with 99% Isopropyl Alcohol and a lint-free wipe.
As you can see, it’s quite easy to create amazing-looking nail extensions with polygel and dual forms. Even if you are a beginner you can try your hand at making gorgeous nails and lovely nail art.
Recommended reading:
Best Polygel Nail Kit Reviews And How To Apply Polygel At Home
Is Polygel Bad For Your Nails? 9 Reasons Why It’s Safe
Best Glitter Polygel Nail Kits
Best And Safest Neon Polygel Nail Kits
Best Polygel Dual Forms For Perfect Nail Extensions
Overlay Nails 101: Acrylic And Gel Nail Overlay On Natural Nails – The Ultimate Guide
12 Best Polygel Nail Kit Reviews And How To Apply Polygel At Home
Best Professional Gel Nail Polish Brands Used In Salons
Non-Toxic Gel Nail Polish Brands 101: Choose The Safest Gel Nail Polish
Most Popular Shellac Colors – The Ultimate List Of 15 Best Shellac Colors For Fantastic Manicures
Best Gel Base And Top Coat: The Updated List Of The Best Gel Nail Base And Top Coat Sets
Best Nail Dehydrator And Primer: The Ultimate Guide
CND Shellac Ingredients And What They Mean
Why Are My Gel Nails Lifting? 15 Reasons Why Your Gel Polish Is Lifting
Best Small Salon Reception Desk: Make An Amazing First Impression
Best No Wipe Gel Top Coat: An Honest Review Of 12 Best No Wipe Top Coat Gel Brands
Black Gel Nails 101 And The Best Black Gel Nail Polish For A Flawless Finish
Nail File Grit Guide And Chart
Overlay Nails 101: Acrylic And Gel Nail Overlay On Natural Nails – The Ultimate Guide
Best No Light Gel Polish — Gel Nail Polish Without UV Light
How To Remove Gel Nail Polish At Home Safely And Easily
14 Best Pastel Gel Nail Polish Sets For A Super-Cute Manicure
30 Best Oils For Cuticles And Nails To Help You Deal With Dry Cuticles And Brittle Nails


